Sewing

My Second Reversible Hoodie!

I made my second reversible hoodie from fabric that I got during my LA Fashion Distric trip. I think both of these are stretch knits that I got from the FIDM scholarship store. I love the black and white side, and I mostly wear that side out. I've had several people comment that it looks like a snowboarding jacket!

I basically made this hoodie the same way that I made the previous one. Except I tried to make this hoodie more slim fitted than the first. Also, instead of using a ribbed knit for the waistband and sleeve cuffs, I just made the hoodie sleeves and waist fitted, so a waistband and cuffs were not needed. I made the length a little longer than the first hoodie, but I found out that I can turn up the bottom, and it makes a nice contrasting waistband if I want to show off the reverse side.

This hoodie is the favorite thing that I've made so far! I love the fit, it wears slim, but not too tight. If I were to make it again, I might make the upper arms a little more fitted, but as it is, it fits perfectly, and is not restrictive to motion at all.

I also love the fabric I used. I kind of wish I had purchased some more. It's a really nice thick, smooth stretch knit on both sides. The black side is heavier weight than the striped colored side.

Showing off the hoodie with my Oscar Boss. I think the hoodie fits really well! No waistband or cuffs, so the lines look really straight and smooth along the body. 

Showing off the hoodie with my Oscar Boss. I think the hoodie fits really well! No waistband or cuffs, so the lines look really straight and smooth along the body. 

Zipper open

Zipper open

Zipper zipped up. Nice and fitted. 

Zipper zipped up. Nice and fitted. 

Showing off the reverse side, with colorful stripes. Again, no waistband and no cuffs if you wear the hoodie long like this. 

Showing off the reverse side, with colorful stripes. Again, no waistband and no cuffs if you wear the hoodie long like this. 

Hands in pockets!

Hands in pockets!

Hood up!

Hood up!

Here I paired the hoodie with the black/gray reversible skirt I showed before. 

Here I paired the hoodie with the black/gray reversible skirt I showed before. 

I folded the bottom of the hoodie up to show a little contrasting waistband. You can also see some contrasting sleeve cuffs from the reverse fabric peeking out. I like that you can show as much or as little of the reverse fabric as you like. 

I folded the bottom of the hoodie up to show a little contrasting waistband. You can also see some contrasting sleeve cuffs from the reverse fabric peeking out. I like that you can show as much or as little of the reverse fabric as you like. 

Twirling with my skirt at sunset

Twirling with my skirt at sunset

Some outdoor photos

Some outdoor photos

More outdoor photos

More outdoor photos

Ok, I hope you enjoyed my newest project! I just call it my second hoodie. I know this post is very photo heavy, but I"m very very proud of it, haha! Like I said, this is so far my favorite piece that I've made. Too bad its too hot here for sweatshirt wearing. I'm hoping I'll get more mileage out of my hoodies in fall/winter.

Thanks for reading!

My Reversible Hoodie

I have been so excited working with projects with my new sewing machine. Now, I will reveal my most complicated sewing project to date! It is a reversible hoodie! It took me 2 days to make it. It is my first shirt/top (everything else I've made so far had been skirt or pants for bottoms). So it was my first time making sleeves, a hood, and my first time putting a zipper in. It was also my first Kangaroo pocket, since everything I'd done previously had been inseam pockets. But the pockets were actually much simpler than inseam pockets. I like making things reversible, and I wanted to hide my ugly seams, so I purposely made it 100% reversible.

The main side is a thick purple stripped terry material with a little stretch, very warm. The reverse side is a solid purple, and is a thinner fabric with very little stretch. On both sides you see the light gray ribbing that I used for the sleeve cuffs and waist trim of the sweatshirt.

Hands in my kangaroo pockets! So stylish and comfy cozy ^_^ I was surprised that my first attempt at a hoodie fit so well! 

Hands in my kangaroo pockets! So stylish and comfy cozy ^_^ I was surprised that my first attempt at a hoodie fit so well! 

Hood on, with Mu rubbing on my legs. 

Hood on, with Mu rubbing on my legs. 

MIlo is wearing his read sequined shirt, haha. 

MIlo is wearing his read sequined shirt, haha. 

Showing off the reverse side, which is a solid purple. Both sides share the gray ribbing cuffs and waist trim. 

Showing off the reverse side, which is a solid purple. Both sides share the gray ribbing cuffs and waist trim. 

Fits very well! Here I'm hiding the irregularity with my pocket, haha. 

Fits very well! Here I'm hiding the irregularity with my pocket, haha. 

I will try to describe how I made it, since I told my friend Anh that I would give her a link for how to make a reversible hoodie. Except I kind of used several sources and combined them all. So hopefully this explaination will help.

The Hoodie http://mellysews.com/2016/02/reversible-zinnia-jacket.html I followed the idea from this website, where they made a reversible hoodie jacket. I did not buy their pattern. I have never bought a commercial pattern, as I don't think it is necessary if you already have clothes that fit you.

I used a hoodie that already fits well on me as a pattern. I lay my hoodie down flat on the fabric that I want to use, look at the seams in the hoodie, and how many pieces it took to make, and I lay flat and cut out the pieces with extra length all around for seam allowance.

My Hoodie required one back piece, two side front (left and right), two arms, and one hood. The arm pieces and hood piece I cut on a fold to make sure it was symmetrical. I probably should have cut on a fold for my back piece and cut the two front side pieces together on a fold to make sure they were symmetrical as well, but it was harder to do that with my premade hoodie pattern. So I just cut around my commercial hoodie, just be sure to give yourself enough seam allowance, otherwise it will end up smaller than you wanted. I also cut out two pocket pieces for each reversible side, using my commercial hoodie as a pattern.

To make the hoodie reversible, you have to cut out two of every pattern piece in your two different fabrics, except the waistband and cuffs. I cut one set out of the striped purple, and one set out of the solid purple.

I then cut out one waistband and two cuffs (one for each sleeve), since both sides will be sharing the waistband and cuffs.

For the construction, I used a zig zag stitch for everything except the zipper, to allow a little bit of stretch in the seams.

I added the kangaroo pockets to the front sides, according to the above website. http://www.ikatbag.com/2010/11/pockets-v-cut-in-patch-pockets.html This website has really good information on kangaroo pockets as well. She has a great series on all types of pockets, that I highly recommend!

I then sewed the side seams, sleeves, arm holes, and hood on. Do this for both reversible sides (striped purple and solid purple), so you end up with 2 separate hoodies.

Then I sewed the hoodies to different ends of the waistband, making sure that when they are put together, both right sides will face outwards. The website has a good picture.

I then attached the cuffs to the outside side only (striped purple). Do not attach to the inside side (solid purple) yet, since you will need the sleeves open to turn the whole jacket inside out later.

I think around this point, I sewed the hood outside and lining right sides together, so the hood had its lining. At this point, you have two jackets connected by the waistband and the hood.

This is when I inserted the separating zipper. The above website did not have much info on sewing the zipper, so I did some more research.

The Zipper First of all, make sure you buy a separating zipper that is long enough for your hoodie. Make sure that the zipper is reversible, meaning it has a pull tag on both sides, so it can be used on both sides.

I bought this 24 inch reversible separating zipper from Amazon, and it was the perfect size. It has nice metal teeth, so it looks durable.

http://www.makeit-loveit.com/2011/10/sewing-tips-installing-a-basic-zipper.html
This is a good tutorial on how to install a basic zipper. However, this does not work for my reversible pattern. But I would read this first because it has good information about how to install a zipper using the zipper foot, proper placement of the zipper, and gives good tips on how to move the bulky zipper pull out of the way.

http://www.craftingfashion.com/2013/10/inserting-separating-zipper-in-thick.html This is the method that I used for installing the zipper on the reversible hoodie. There is a very good image that they have where they show the zipper sandwiched between the two sides of the fabric, with right side and wrong side clearly marked. I followed this to get my zipper inbetween the two sides. I just pinned the zipper in place instead of basting.

This is the image I thought was super helpful for zipper placement. Your fabric is right sides together, with the zipper in between, but the zipper teeth must be facing towards the inside of the sandwich. 

This is the image I thought was super helpful for zipper placement. Your fabric is right sides together, with the zipper in between, but the zipper teeth must be facing towards the inside of the sandwich. 

http://www.sewingmamas.com/b/showthread.php?131698-lined-jacket-with-separating-zipper-tutorial-dwnl
This was another good description on how to install a separating zipper into a lined jacket, which is basically the same as a reversible jacket. She also shows how she does the cuffs for a lined jacket. The pictures and text here are a little more difficult to follow, so I would follow the one above if possible.

Finishing
Once you have both sides of the zipper sewn in, you will have to turn the whole jacket inside out. You have to do this through the open sleeve, so it will be a tight fit, but you have to pull the whole hoodie inside out through one of the sleeves. Hopefully you either did not attach the cuff, or only attached one side of the cuff.

Once you pull the hoodie inside out, so it is right side out, the last step is to finish the cuffs. Since I machine sewed the gray cuff to the striped purple side before adding the zipper, my cuffs were half on already. I just needed to attach the gray cuff to the solid purple side.

To be honest, the instructions here and here for how to finish the cuffs were kind of confusing to me. So I just hand stitched the gray cuff closed to the solid purple linind side. I used a blind ladder stitch (http://www.squishycutedesigns.com/ladder-stitch/) Just make sure your inside sleeve is not twisted before you sew it, otherwise your cuff will look twisted when you wear it. I made that mistake, and had to redo one of my cuffs to make it look nicer.

Ok, I hope that explaination was a little helpful. I know it is kind of confusing because I combined different sources, and didn't use a real pattern, but instead cut a pattern based on one of my existing hoodies. Hopefully you could follow it well enough though. If you have any questions, I am responsive via email!

Thanks, and good luck!

Trip to the LA Fashion District

I had been wanting to check out the LA Fashion District since I moved to southern California two weeks ago. I had the opportunity this past weekend, when my husband and I were going to the LA County Museum of Art (LACMA). I had gotten us tickets to see the Rain Room, which had been sold out for some time. Before we headed to the LACMA, we made a stop at the Fashion District to check out some fabric.

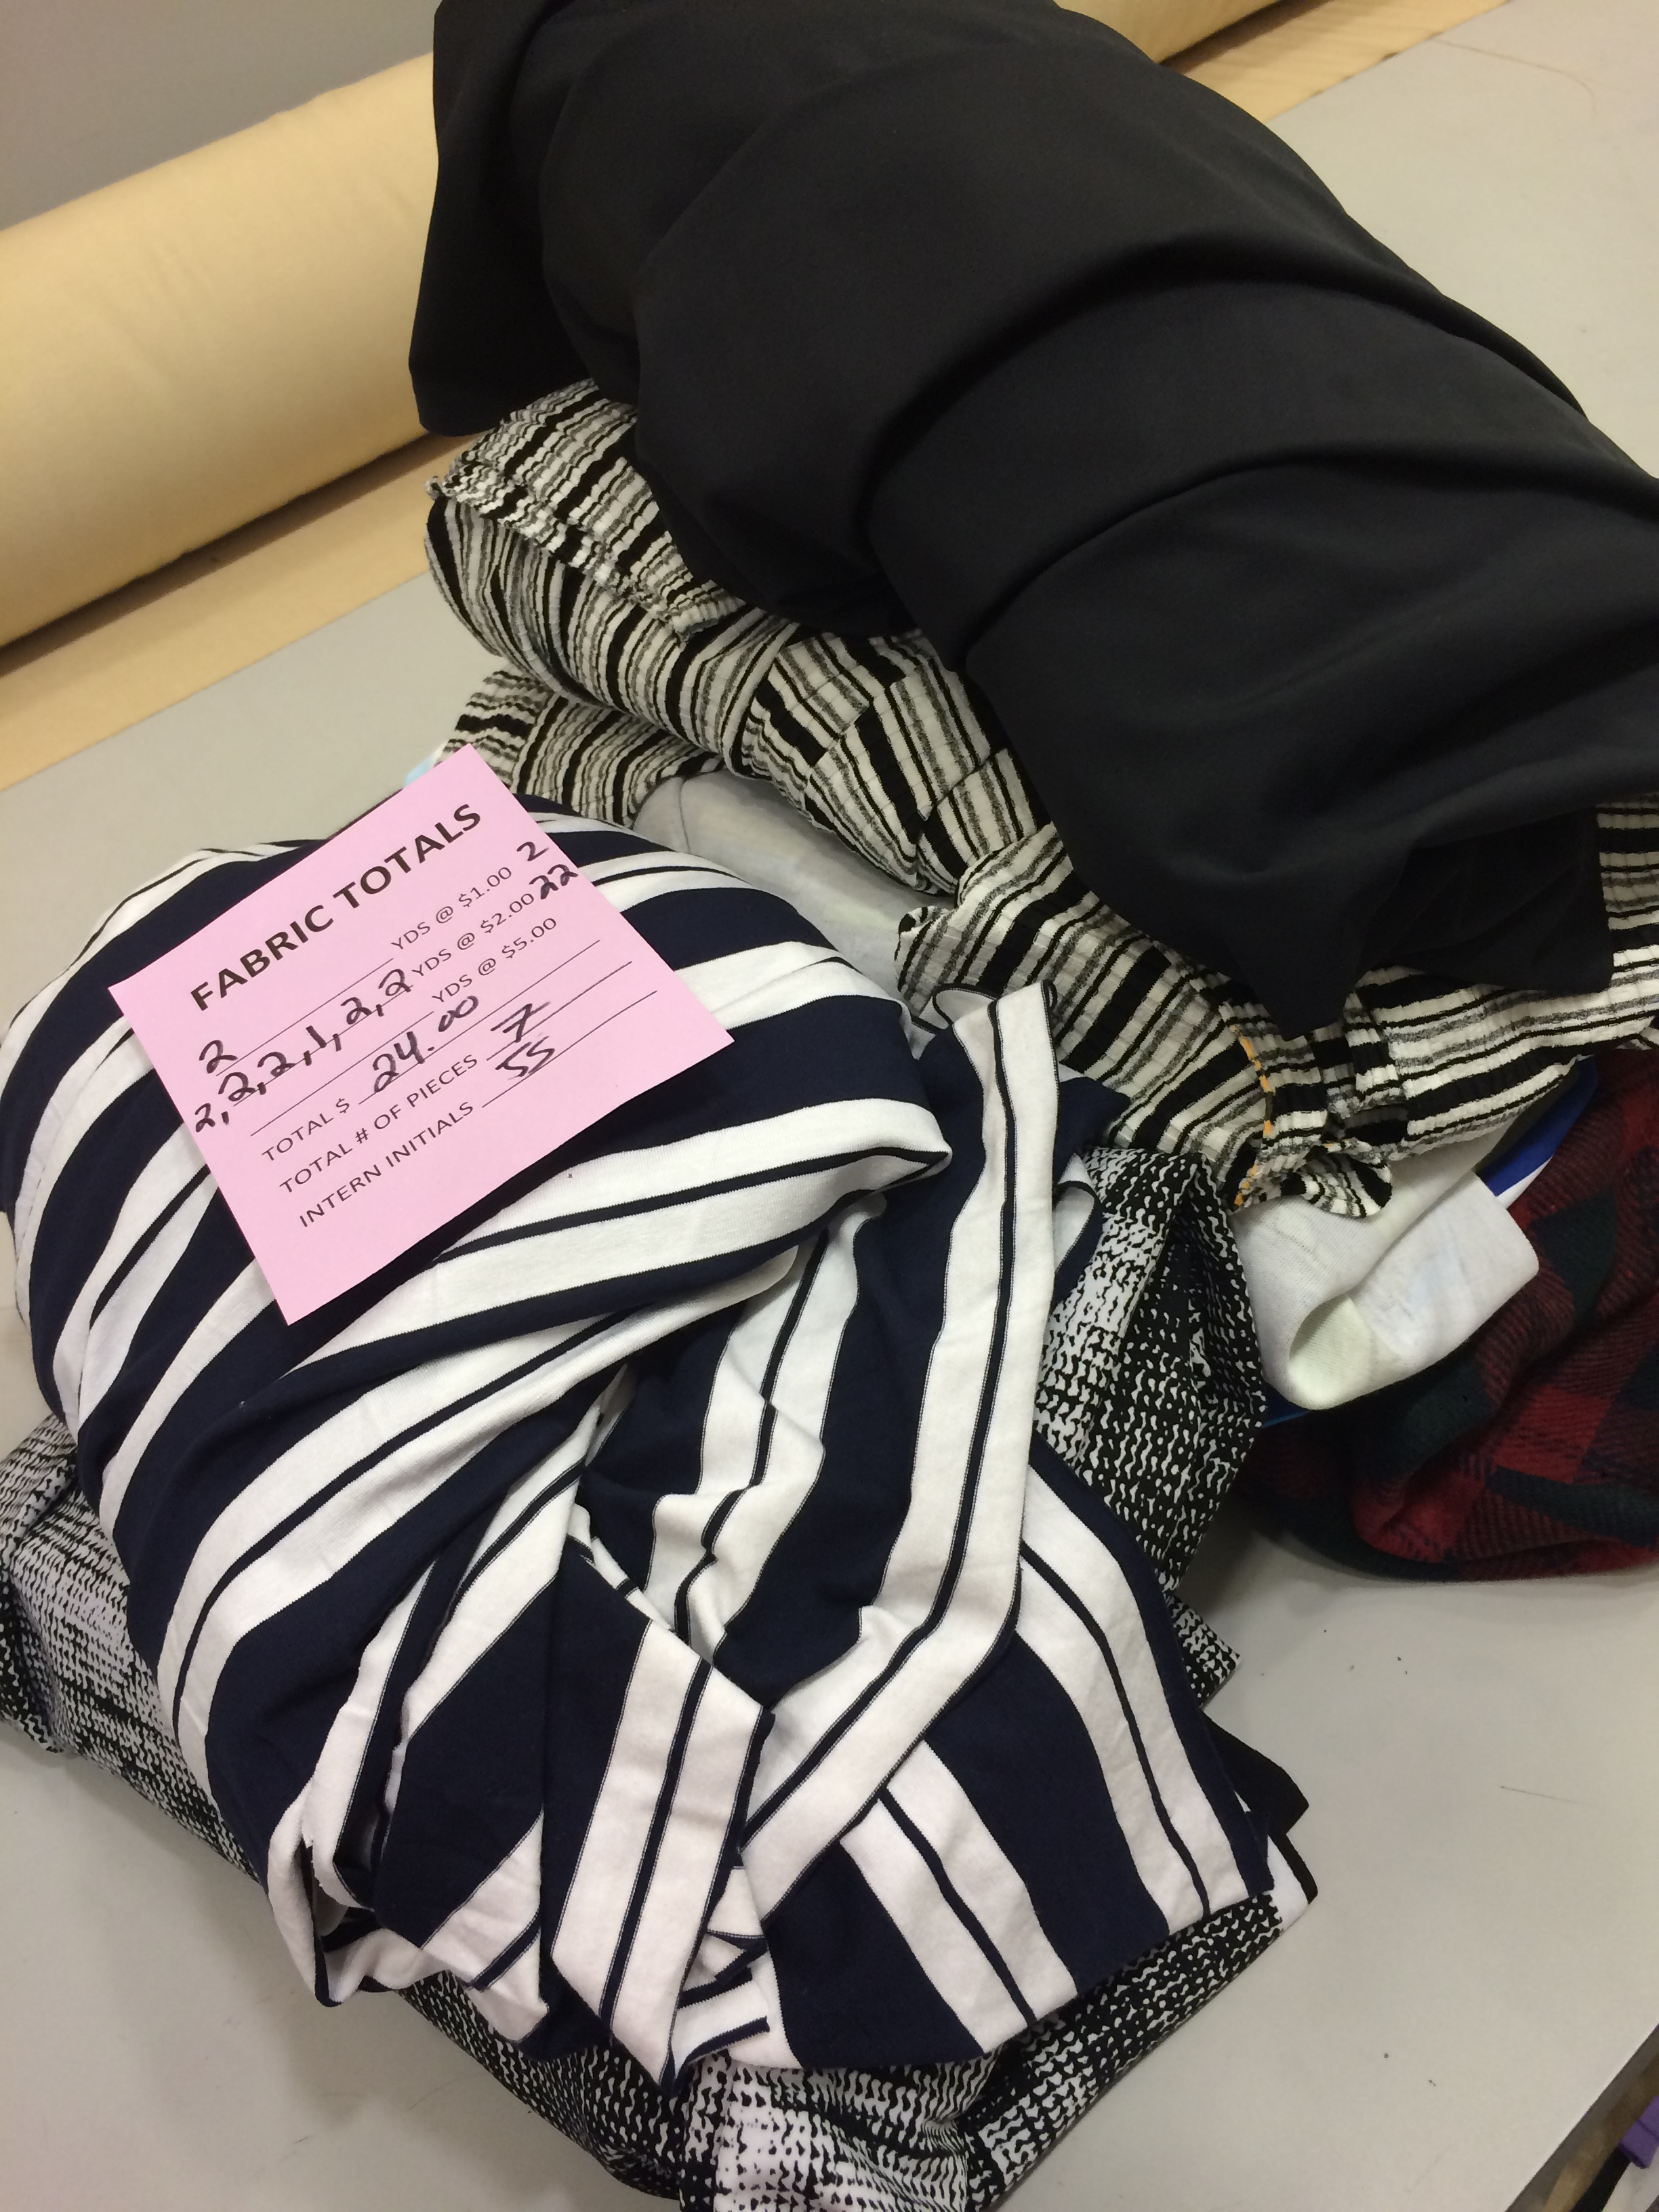
My first stop was the FIDM Scholarship store. I had heard about the place from some other blogs online. It was a super cool store, and the fabric is a great deal. Solids are only $1.00 per yard, and prints are only $2.00 per yard. They do have some specialty fabric for $5.00 per yard, but I didn't really look at any of those.

The FIDM Scholarship store had a lot of other stuff, not just fabric. They had denim bottoms (jeans and shorts) for only $5.00, and lots of clothing for really cheap. They also had a wall of special occasion gowns for $25 -$50, and a wall of wedding dresses for less than $300, some as low as $50!.

The FIDM Scholarship store. 

The FIDM Scholarship store. 

I bought $24 worth of fabric. I'm really into stripes these days. 

I bought $24 worth of fabric. I'm really into stripes these days. 

This is part of the fabric wall. It was super fun to just look around and touch all the fabrics! 

This is part of the fabric wall. It was super fun to just look around and touch all the fabrics! 

My next stop was the Michael Levine Loft, which I had also read about prior to coming to the Fashion District. We didn't have time, so I skipped the main store and went straight to the Loft. Here, they sell fabric for $3.00 per POUND. That would be a huge deal if you bought silks or lightweight fabric. I bought mostly knit, which is heavier. I walked out with a little less than 7 lbs of fabric, but I forgot to take a picture of it. It was a great deal for about $21.00. The fabric is mostly in big bins, which is kind of fun to scrounge around in, but it's not organized in any way, so it feels kind of like a treasure hunt. So you'll have to like that sort of thing. I personally thought it was lots of fun, but I wasn't trying to find anything in particular.

Rummaging in the boxes at Michael Levine Loft, so much fun!

Rummaging in the boxes at Michael Levine Loft, so much fun!

After my trip to the FIDM scholarship store and the Michael Levine Loft, we headed to the LACMA. It was our first time there. We went to the Rain Room, which was very cool, and walked around a lot of the general exhibits, but there wasn't enough time to see everything. Definitely worth a second trip!

I think it would be fun to go back to the Fashion District and walk around the streets and look at the other shops. The sidewalks are filled with shops showcasing their fabric, and I really didn't get a chance to experienc it all.

Fabric on the sidewalks everywhere!

Fabric on the sidewalks everywhere!

I didn't really get to see everything the Fashion District has to offer. Must go back later! 

I didn't really get to see everything the Fashion District has to offer. Must go back later! 

Thank you for reading! I will update next time I go to the LA Fashion District!

My First Sewing Projects

Hi
I'm in california now, and I have vacation for a little while before intern year starts. I stay home during the day, and I've been working on learning how to sew. I wanted to share some pictures of the sewing projects that I've completed over the past week!

I started with some more strawberry bags. I followed the tutorial from http://www.ikatbag.com/2010/04/strawberry-bag.html

Made two of these strawberry bags

Made two of these strawberry bags

Bag stuffed into the strawberry corner. I have to get a drawstring to close it up properly.  

Bag stuffed into the strawberry corner. I have to get a drawstring to close it up properly.  

Closeup of the strawberry corner

Closeup of the strawberry corner

I got fancy and used a twin needle for the first time! I think it looks interesting, with the double stitch and zig zag on the inside. 

I got fancy and used a twin needle for the first time! I think it looks interesting, with the double stitch and zig zag on the inside. 

And I made a pillowcase with a pocket for my sleeping mask. I like the textured fabric, but it was hard for my sewing machine to work with.

Pillow with sleeping mask pocket! I love the textured knit fabric I used, but it was kind of difficult for me to get it to sew properly. I'm going to save the rest of the fabric for another project once I'm a little better. 

Pillow with sleeping mask pocket! I love the textured knit fabric I used, but it was kind of difficult for me to get it to sew properly. I'm going to save the rest of the fabric for another project once I'm a little better. 

Close up of the textured fabric. The other picture is more accurate in terms of color, it looks too washed out in this pic. 

Close up of the textured fabric. The other picture is more accurate in terms of color, it looks too washed out in this pic. 

Then I got real fancy and started making skirts! This is a reversible skirt with foldover waistband and an inseam pocket at the waistband on each reversible side, so total of 2 pockets. One side has a striped pattern and the other side is floral. The material is a cotton jersey knit.

Black, red, and white striped side of the skirt with contrasting floral waistband

Black, red, and white striped side of the skirt with contrasting floral waistband

Floral side of the skirt with contrasting waistband

Floral side of the skirt with contrasting waistband

Showing off my inseam pocket! Pockets in this skirt were sewn into the waistband seam

Showing off my inseam pocket! Pockets in this skirt were sewn into the waistband seam

Showing off my pocket again! I love making pockets :-) All skirts should have pockets!

Showing off my pocket again! I love making pockets :-) All skirts should have pockets!

This is my second reversible skirt, also cotton jersey knit fabric. I left the hem open, so it looks like a 2 tiered skirt on the gray side. I repeated the foldover waistband in this skirt. I added two inseam pockets on both of the reversible sides, and put the pockets on the sides of the skirt instead of at the waistband, so 4 pockets total.

My second reversible skirt with pockets! Gray with confetti on one side, black floral on the reverse side. If you wear it a certain way, it looks like a 2 tiered skirt! I think it's a cool effect that wasn't exactly intentional, but I like it better…

My second reversible skirt with pockets! Gray with confetti on one side, black floral on the reverse side. If you wear it a certain way, it looks like a 2 tiered skirt! I think it's a cool effect that wasn't exactly intentional, but I like it better this way. 

Showing off the pockets. This time I had two inseam pockets on the sides of the skirt instead of the waistband seam. 

Showing off the pockets. This time I had two inseam pockets on the sides of the skirt instead of the waistband seam. 

Showing second pocket. I couldn't get a pic of both hands in the pockets since I was taking selfies with my phone. 

Showing second pocket. I couldn't get a pic of both hands in the pockets since I was taking selfies with my phone. 

Black floral side with contrasting waistband. It's hard to tell in the pictures, but there are subtle flowers outlined in gray on the black side. 

Black floral side with contrasting waistband. It's hard to tell in the pictures, but there are subtle flowers outlined in gray on the black side. 

Showing off the pockets, one on each side. The lining is contrasting gray. 

Showing off the pockets, one on each side. The lining is contrasting gray. 

This is my first pajama pant. I used a soft fleecy fabric and used an existing pajama pant as a template. I used extra material from my gray skirt for the waistband, since it was stretchy, so I did not need to use an elastic for the waistband. This also has 2 inseam pockets.

My first pajama pant! So soft and so comfy

My first pajama pant! So soft and so comfy

Showing off the pockets, I love pockets! The waistband is the same gray confetti that I used for my skirt. My husband keeps thinking that I'm wearing a skirt under my pajamas! 

Showing off the pockets, I love pockets! The waistband is the same gray confetti that I used for my skirt. My husband keeps thinking that I'm wearing a skirt under my pajamas! 

Another view 

Another view 

I also made Milo some clothes! He has a red sequin shirt and a black and red striped shirt (same material as my skirt, so we can be matchy matchy!). These shirts use velcro closure. I'm going to make him a tiger shirt next, haha.

Milo in his red, black, and white thundershirt! Its the same material as my first skirt. I need to get a picture of us together all matchy matchy! 

Milo in his red, black, and white thundershirt! Its the same material as my first skirt. I need to get a picture of us together all matchy matchy! 

My husband says Milo looks like he's an Olympic athlete from Yemen and he's wearing his country's flag during the medal ceremony. I call this Milo's Yemen shirt. 

My husband says Milo looks like he's an Olympic athlete from Yemen and he's wearing his country's flag during the medal ceremony. I call this Milo's Yemen shirt. 

Closeup showing what I did for the velcro closure. I just used a zig zag stitch all around. The Yemen shirt is lined with the gray confetti fabric on the interior. 

Closeup showing what I did for the velcro closure. I just used a zig zag stitch all around. The Yemen shirt is lined with the gray confetti fabric on the interior. 

Milo's red sequin shirt! He looks Fabulous! 

Milo's red sequin shirt! He looks Fabulous! 

My husband hates it when I have Milo wear this shirt, haha. 

My husband hates it when I have Milo wear this shirt, haha. 

Hope you like these projects! It was a lot of fun!